Incline Dumbbell Press: Benefits and Proper Technique
Train the upper chest with the incline dumbbell press. Learn setup, technique, variations, recovery tips and practical post-workout meal ideas.
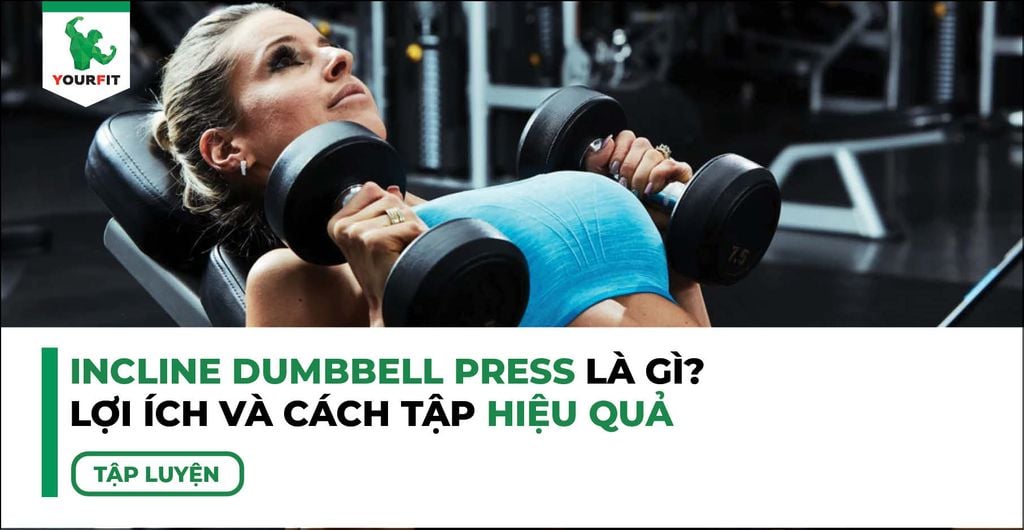
The incline dumbbell press emphasizes the upper chest while also involving the front shoulders and triceps. It offers a flexible way to develop upper-body strength, muscular balance and pressing control. This guide covers the exercise, its benefits, energy expenditure, technique, variations and recovery.
1. What is an incline dumbbell press?

The incline dumbbell press is a compound exercise performed with two dumbbells on a bench inclined roughly 30–45 degrees. The angle places greater emphasis on the upper portion of the pectoralis major, with the anterior deltoids and triceps assisting the press.
Compared with a barbell, dumbbells let each arm move independently and provide more freedom to choose a comfortable movement path. This can help you identify side-to-side differences and develop control. It is a useful complement to flat pressing and can support the upper-body capacity used in sports such as basketball, volleyball and boxing.
Loads vary widely. A beginner might use 5–10 kg dumbbells or less, while an experienced lifter might use 20–40 kg; these are examples, not targets or prerequisites.
- Upper chest: produces much of the pressing movement.
- Front shoulders: assist the press and control the upper arms.
- Triceps: extend the elbows.
- Core: helps keep the torso stable.
- Serratus anterior and other shoulder-blade muscles: contribute to shoulder control.
2. Benefits of the incline dumbbell press

2.1. Develop the upper chest
The inclined position gives the upper chest dedicated work, helping create balanced development when combined with other chest exercises.
2.2. Increase upper-body pressing strength
The chest, front shoulders and triceps work together. This can complement overhead presses, push-ups and dips, as well as everyday lifting and pushing.
2.3. Improve coordination and stability
Each arm controls its own weight, so the stronger side cannot simply move a shared bar for the weaker side. Use this independence to practise consistent movement on both sides.
2.4. Train the front shoulders
The incline also challenges the front deltoids, adding useful pressing work for a balanced upper-body programme.
2.5. Allow an adjustable movement range
Dumbbells offer freedom around the chest and shoulders. Use that freedom to find a comfortable range rather than lowering as far as possible.
2.6. Adapt to different abilities
An adjustable bench and different dumbbell weights make it easy to scale the exercise at home or in a gym.
2.7. Rebuild strength when appropriate
Light, controlled pressing may form part of an individually prescribed return to training after injury. The exercise and range should be selected with a qualified professional when rehabilitation is the goal.
2.8. Practise controlled posture
The exercise reinforces a stable torso and supported shoulder position. Combine it with pulling exercises and general movement rather than expecting pressing alone to correct rounded shoulders.
3. Energy expenditure during incline dumbbell presses

Incline pressing uses several muscle groups and contributes to workout energy expenditure. There is no dependable fixed calorie total for five minutes of this exercise, and it is better programmed for strength and muscle development than for a specific calorie target.
- Load: Heavier dumbbells increase muscular demand, but the weight must remain controllable.
- Repetitions and sets: More total work generally requires more energy. For example, four sets of 12 repetitions involve more work than three sets of eight at the same load.
- Tempo: A faster pace changes the demand, but rushing can reduce control.
- Rest: Shorter rests of 30–45 seconds make lighter work denser; 60–90 seconds or longer may be needed for harder sets.
- Individual factors: Body size, fitness and movement efficiency affect energy use.
- Technique: Stable, controlled repetitions help you load the intended muscles consistently.
For a balanced routine, combine pressing with other strength patterns such as squats and pulls, plus cardio such as running or skipping when appropriate.
4. Important training and recovery tips
4.1. Learn the movement first
Begin with light dumbbells and a slow, controlled motion. Avoid momentum or jerking, and ask a coach to check your setup if needed.
4.2. Choose a manageable load
A 5–10 kg dumbbell may suit some beginners, but use less if necessary. Reduce the load if the weights shake beyond your control or you cannot maintain your position. Stop if you experience pain.
4.3. Adjust the bench
Start around 30–45 degrees. A steeper angle generally shifts more emphasis toward the shoulders, so choose the angle that matches your goal and feels comfortable. Check that the bench is secure.
4.4. Breathe steadily
Inhale while lowering and exhale while pressing. Avoid prolonged breath-holding that leaves you dizzy or unable to control the weights.
4.5. Avoid common errors
- Keep the elbows at a comfortable angle, roughly 45 degrees from the torso, rather than flaring them widely.
- Keep the torso supported and avoid an exaggerated lower-back arch.
- Lower only as far as your shoulders can comfortably control, bringing the weights beside the upper chest.
- Do not bang the dumbbells together at the top.
4.6. Allow recovery
A schedule of 2–3 pressing sessions per week with roughly 48–72 hours between demanding sessions is one option. Adjust according to the rest of your programme and how well you recover.
4.7. Respond to pain
Stop for pain in the chest, shoulders or elbows. If you have a history of injury, obtain individual guidance before returning to loaded pressing.
4.8. Post-workout meal ideas
Meals containing protein, carbohydrate and some healthy fats support recovery. You can eat soon after training when convenient; there is no need to treat 30–60 minutes as a strict deadline. Practical options include:
- Banana and oat protein smoothie: Blend one banana, 30 g oats, one scoop of whey protein, 200 ml almond milk and one spoonful of peanut butter.
- Brown rice with grilled chicken and vegetables: Combine about 100 g chicken breast, 100 g brown rice and steamed broccoli or carrots, with a spoonful of olive oil if desired.
- Wholegrain toast with eggs and avocado: Use two slices of bread, two boiled eggs, a quarter of an avocado and some lettuce.
- Salmon and sweet-potato salad: Serve about 100 g pan-seared salmon with 100 g roasted sweet potato, leafy vegetables and a light oil-and-vinegar dressing.
- Greek yogurt with fruit and nuts: Combine 150 g yogurt, 100 g berries and 10 g chia seeds or almonds.
Drink according to thirst and sweat losses; 300–500 ml after training can be a starting point, with more needed in hot conditions or after substantial sweating. Protein supplements are optional conveniences. If you are considering supplements, review your overall diet and needs with a qualified nutrition professional.
5. Technique and variations

5.1. Prepare
Use a stable bench set around 30–45 degrees, a suitable pair of dumbbells and enough clear space to handle them. Warm up for 5–10 minutes with comfortable shoulder movements, arm circles, easy push-ups or light presses.
5.2. Perform the basic press
- Sit on the bench with your feet firmly on the floor. Start with the dumbbells supported on your thighs and bring them carefully to the upper-chest position as you lie back.
- Brace the abdomen and keep your back supported with a comfortable natural curve. Set the shoulders securely against the bench.
- Inhale and lower the weights beside the upper chest, keeping the elbows at a comfortable angle from the torso.
- Stop at a depth you can control, around chest level or slightly below if comfortable.
- Exhale and press the dumbbells over the chest until the arms are almost straight, without forcefully snapping the elbows into lockout.
- Use a deliberate tempo, such as 2–3 seconds to lower and about two seconds to press.
Try 3–4 sets of 8–12 repetitions while learning. Experienced lifters may use 6–10 repetitions with heavier weights. Rest 60–90 seconds or longer as needed; shorter 30–45-second rests are an option only when the load and technique remain manageable.
5.3. Technique reminders
Keep the torso supported, elbows controlled and neck relaxed. Lower rather than drop the weights, avoid banging them together and maintain a stable shoulder position throughout.
5.4. Variations
- Single-arm incline press: Work one arm at a time while resisting trunk rotation.
- Pause press: Pause for 1–2 seconds at the controlled bottom position without resting the dumbbells on your chest.
- Rotating-grip press: Gradually rotate toward palms facing each other at the top, using a comfortable wrist position.
- Band-resisted incline press: Add a securely positioned band only when you understand the setup and can control the changing resistance.
- Low-incline press: Use a 15–30-degree angle for a different balance of upper- and mid-chest involvement.
- Neutral-grip incline press: Keep the palms facing each other. Some lifters find this more comfortable for the shoulders.
- Stability-ball variation: An appropriately rated ball adds instability and trunk demand. Use a much lighter load and a secure setup; it is an optional advanced variation, not a requirement for chest growth.
6. Conclusion
The incline dumbbell press can develop the upper chest and improve pressing strength when the load, angle and range suit you. Combine consistent technique with adequate nutrition and recovery, and progress gradually. Share your experience with YourFit.